Guides - Creating a portfolio with Essential Portfolio
In this guide we'll be going through the steps to set up a brand new website using the Essential Portfolio template.
Before you begin
If you're new to DPG, prepare some images or native video to upload. You can always add more later, but it will help you to see some real content when making initial design choices. And don't worry too much about any information you add using the helper (such as the name of the website or the header text), everything can be edited once the site is created.
In this guide:
- Create the site
- Follow the helper
- Preview your site using a testing host
- Edit content
- Add navigation items
- Add social icons
- Add media
- Create sets
- Edit the design
- Edit the contact page
- Add website icons
- Add homepage description
- Set up a public host
Let's begin! 🚀
Create the site
From the Dashboard navigate to the websites screen by clicking Manage.
Choose the New site tab, then Websites where you will see the Essential Portfolio template.
Select an initial theme and index view preset for the site (this can be changed later) and click Create.
Follow the helper
Click Start to use the helper and fill in some basic information for your site. This will guide you through a few steps to easily configure things like the header and contact page. You'll also add some images to make design customisations easy to visualise.
Once you've completed each step, click the Build website button.
You'll see a Creating website loading screen. Stay on this page while the website is created, this may take a few minutes depending on the size and quantity of your images.
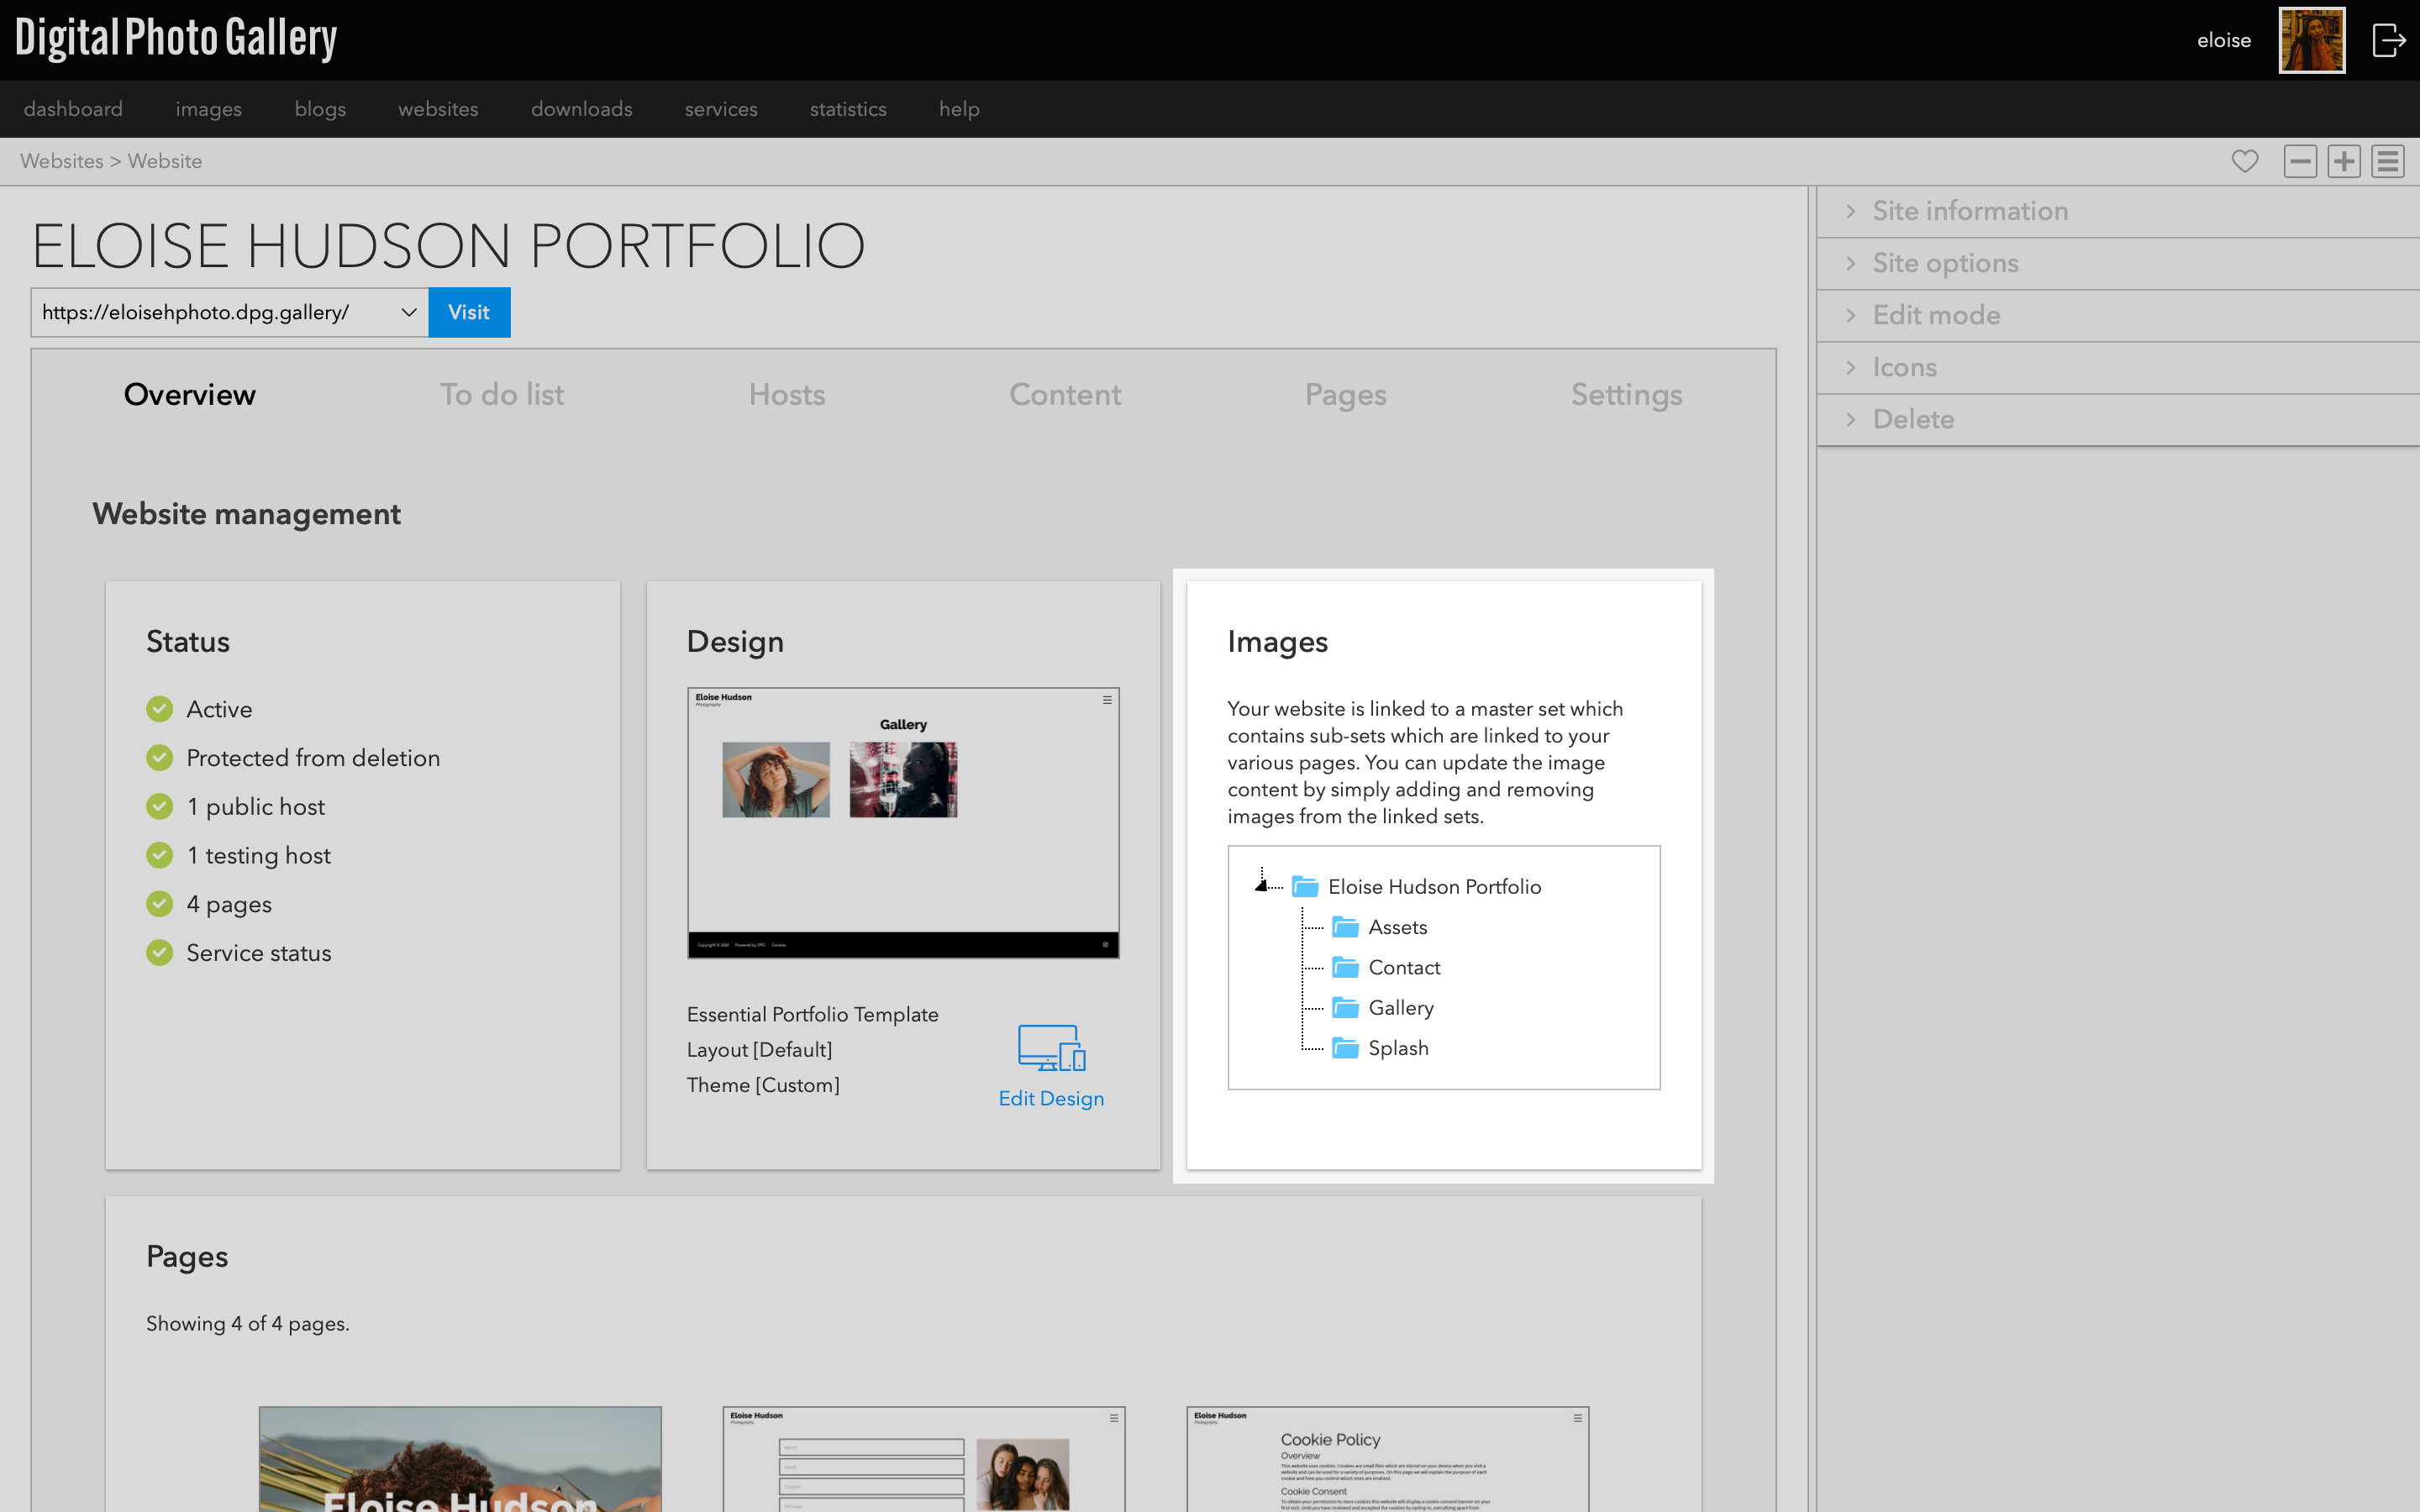
Once the website is created, you'll see the website Overview screen. This will be your starting point for anything to do with this website.
Preview your site using a testing host
Click the Visit button to preview your site on the web. If you've added content using the helper in the previous step, you should see your site is beginning to take shape.
Edit content
From the website Overview screen, choose the Content tab. This is where you can edit information that appears on your website such as the header and footer text, navigation items and social icons.
Add navigation items
You can add and remove navigation items here. These can link to other DPG or external websites.
Select the Main Navigation tab. Click the Create button, select type Standard and enter a name and URL. Click OK and repeat this process for each new item.
To add a new page to the navigation, create it in Pages first.
Add social icons
Add links to your social media profiles. These will appear as icons in the footer and overlay navigation.
Select the Social tab. Click the Create button to choose a service and enter the address of your social media links.
Add media
On the Overview screen you'll see the sets linked to this website. The Gallery page is linked to the Gallery set. You can add images or native videos to this set to see them on the gallery page of your site.
Create sets
You can use sets to organise your work. Learn more about sets and the gallery page structure here. If you want to keep all you images inside the gallery without separating them into sets, you can skip this step 🏃.
To convert the existing images into a nested set, click on the Gallery set from the Overview screen.Open the New set panel and enter a name for the set. Click the Create button. Select all the images inside the gallery.
Open the Add to set panel and navigate to the Gallery set. You'll now see your newly created set nested inside Gallery. Select it and click Add.
Once done, you can use the Remove panel to remove the images from the main Gallery set (they'll still remain in the new nested set where you just put them!).
You can create more sets inside the Gallery set to further organise your work, then add images and native video to populate your gallery.
If you've created some nested sets and added images, you will see them on your site.Edit the design
This template comes with a number of pre-made themes, layouts and navigation styles. There are endless customisations to make the design your own. In the Design section, start by choosing a theme and a gallery style (if you're happy with what you chose at the start, then stick with that but switching is just one click if you want a change). Once you're happy with the general layout, customise fonts and colours in the Style tab.
To enter the Design section from the Overview screen, click the Edit Design icon. In the sidebar choose the Style then Theme tab. Select a Theme to use or customise later.
Your theme will preview in the main window and you can click Save when you're happy with your choice.
Select the Page tab to see an array of options relating to the page's design. In the Components tab you'll see options for the page header, gallery views, footer and more.
Try different styles to change the look of your website.
If you've created sets, you can change the style of the sets view.These options are contextual to the preview window on the left of the screen. If you navigate to a different page, you'll see layout options specific to that page.
Edit the contact page
Select the Pages tab and click the Edit button on the Contact page. Here you can edit the default Text and if you need to, the email address you entered in the Contact tab.
Add website icons
Website icons are the icons you see in the corner of a web browser tab, when bookmarking a page or saving it to a mobile device. Using custom icons is a great way to showcase your brand.
You can add common website icons in the side panel of the website overview screen.
Add homepage description
Under the General tab, you can enter a description of your website. This is used by search engines and will be seen by visitors who search for your work, so use plain text rather than keywords to describe your site.
Set up a public host
AKA going live! If you're happy with your site, setting up a public host is the final step before making the website public. This will be the url that you share with the world. If you have your own domain name, you can configure it in the Hosts panel. If you don't have your own domain, you can set up a free dpg.gallery URL.
You can create a free dpg.gallery host, move a host from an existing DPG site or add your own new domain in the Hosts tab.